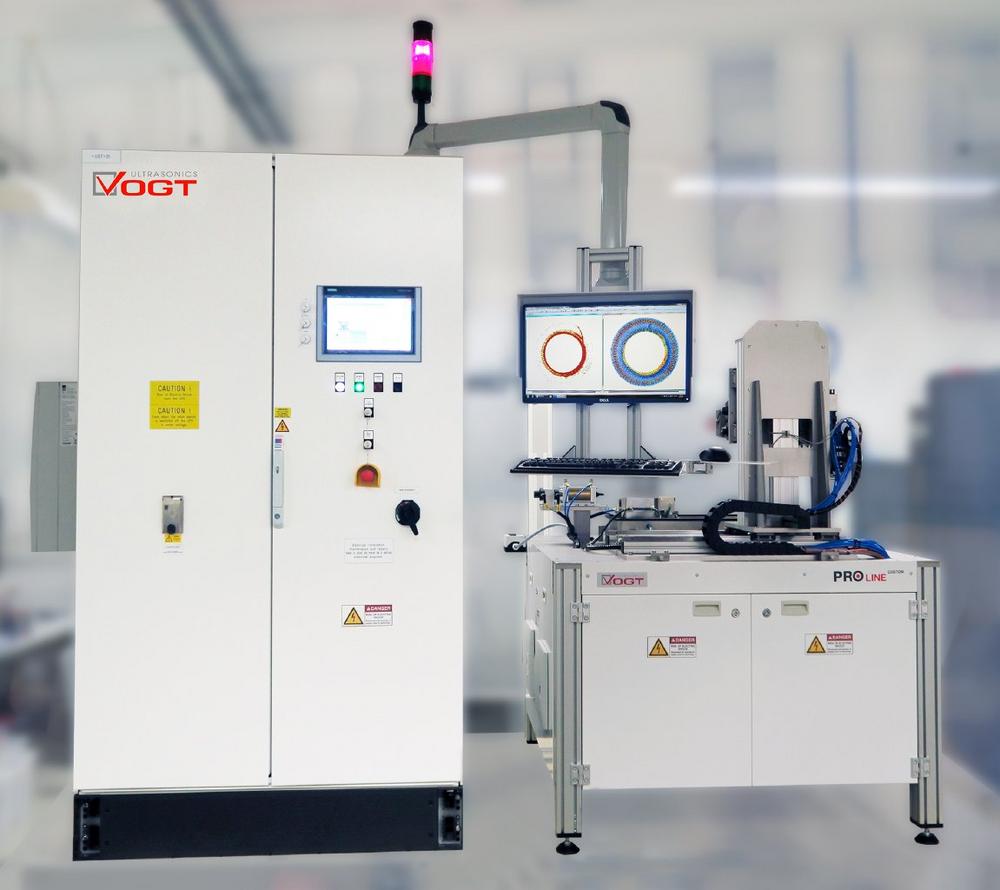
The task was to develop a test system that reliably inspects rotors in the shortest possible time while ensuring a very high level of system availability. The system was designed as an integral part of a production line.
Phased Array and Bubbler-Technique
The used VOGT Phased Array ultrasonic inspection system works immersion-free in bubbler technique. The component is locally moistened with water to couple the ultrasound. This means that a complex and cost-intensive drying stage is not required.
The use of Phased Array ultrasound technology leads to a considerable reduction in testing time. Phased Array ultrasound systems are based on the principle of multi-element testing. A probe can have up to 128 elements, which can be activated electronically either individually or in group. This creates a focused ultrasound.
The inspection software creates two-and three dimensional views of the component with the inspection areas showing the sizes and locations of the detected defects. The advantages of this technique are the beam focusing and control and the possibility of linear or sectoral testing. This allows defects to be detected quickly and reliable with just one probe, independent of direction.
The developed ultrasonic inspection system thus achieves a cycle time reduction by a factor of 30 compared to the conventional inspection method.
Automation creates test reliability
After the rotors have been welded by the customer’s system, they are subjected to an automatic quality control in the subsequent process step. A robot feeds them to the VOGT ultrasonic inspection system in 24/7 operation. The inspection task is to test the weld seams of the copper components on their both end faces for imperfections. Optionally, the 0° marking of the cylindrical component is made by means of a mandrel, which is driven into the component by a pneumatic stamp. If required, this enables a local metallurgical inspection of the component at the defect location.
The components are tested for defects with a site of up to 0.35mm2. After scanning the first end face, the component is rotated by a gripper located in the VOGT inspection system, optionally marked again and the second end face tested.
The inspection software evaluates the test data automatically on the basis of previously defined evaluation criteria and communicates the test result (OK/ NOT OK) to the customer’s central control system. For this purpose the raster scan software with a stencil synchronization module is used due to the complex, non-contiguous test area. Afterwards, the components are automatically fed by a robot into the further production process or are sorted out as NOT OK.
For more than 35 years VOGT Ultrasonics, Hanover/Germany designs, configures and distributes automated and mechanized non-destructive testing systems and services for the inspection of metal and synthetic materials.
Innovative ultrasonic technology is the key to reliable and fast inspection in production and the laboratory. Whether it is a question of heavy-weight semi-finished products and forged parts, delicate welded seams or complex components: VOGT has a variety of methods and solutions to cope with the most varied of situations – from portable testing equipment to stationary high-precision systems.
VOGT also provides all conventional non-destructive testing services, as well as mechanized and automated ultrasonic inspection at your premises or in our testing centre. Our NDT technicians are certified according to ISO 9712 and qualified according to EN 4179 / NAS410.
VOGT is certified and accredited acc. to DIN EN ISO/IEC 17025 and ISO 9001, as well as EN 9100 and has representatives in major countries worldwide.
VOGT Ultrasonics GmbH
Ehlbeek 15
30938 Burgwedel
Telefon: +49 (5139) 9815-0
Telefax: +49 (5139) 9815-99
https://www.vogt-ultrasonics.de
Leitung Marketing
Telefon: +49 (5139) 9815-36
Fax: +49 (5139) 9815-99
E-Mail: marketing@vogt-ultrasonics.de
